Chances are that either you or someone you know well has suffered, or is suffering now, from back pain. Millions of Americans reportedly do each year. While no simple recommendation could address nuances of each individual’s circumstances and needs, the holistic recommendations provided below might constitute a starting point, or a new and healthy challenge to include in your daily routine. Sometimes small changes can bring about more comfort when you need it most. The key lies in consistency. Small practices every day are better than one big effort once a week.
Gentle Movement
While hitting the gym hard might sound like a good idea, statistics show that most people burn out quickly or become injured. If you can establish a habit of consistent, yet gentle daily movement, you might be more likely to stay the course over the long term and avoid injury as well. Consider walking, tai chi or qigong, swimming, or very select yoga.
The “select” yoga recommendation comes from a conclusion I’ve drawn during 12 years of teaching yoga: Very few yoga studio classes are appropriate for the average person over 25 years old who walks in from the street. If you’re 25 or below and injury free, the world of movement or exercise is your oyster. For the rest of us, with decades of movement patterning, historical injuries, or health issues spanning from muscular-skeletal to digestive, the popular American “flow” style of yoga simply is not appropriate.
Yoga classes that would best address a person with back pain would be very slowly-moving classes, which allow time for safely getting into and out of poses. Such classes also enable the teacher to better address each student’s needs within a class setting. Key words for an appropriately slow and mindful style of yoga include “restorative,” “yin,” “rehabilitative,” or “chair.” It also can be helpful to find a teacher who has more than five years of teaching experience, and perhaps one who has personally experienced and addressed back pain.
Yoga Poses for Your Back
As with any form of exercise, tread lightly and slowly if you have pain or a current injury. The poses below are intended to be followed in the sequence presented, as each one supports the next.
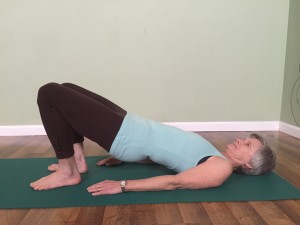
Bridge pose
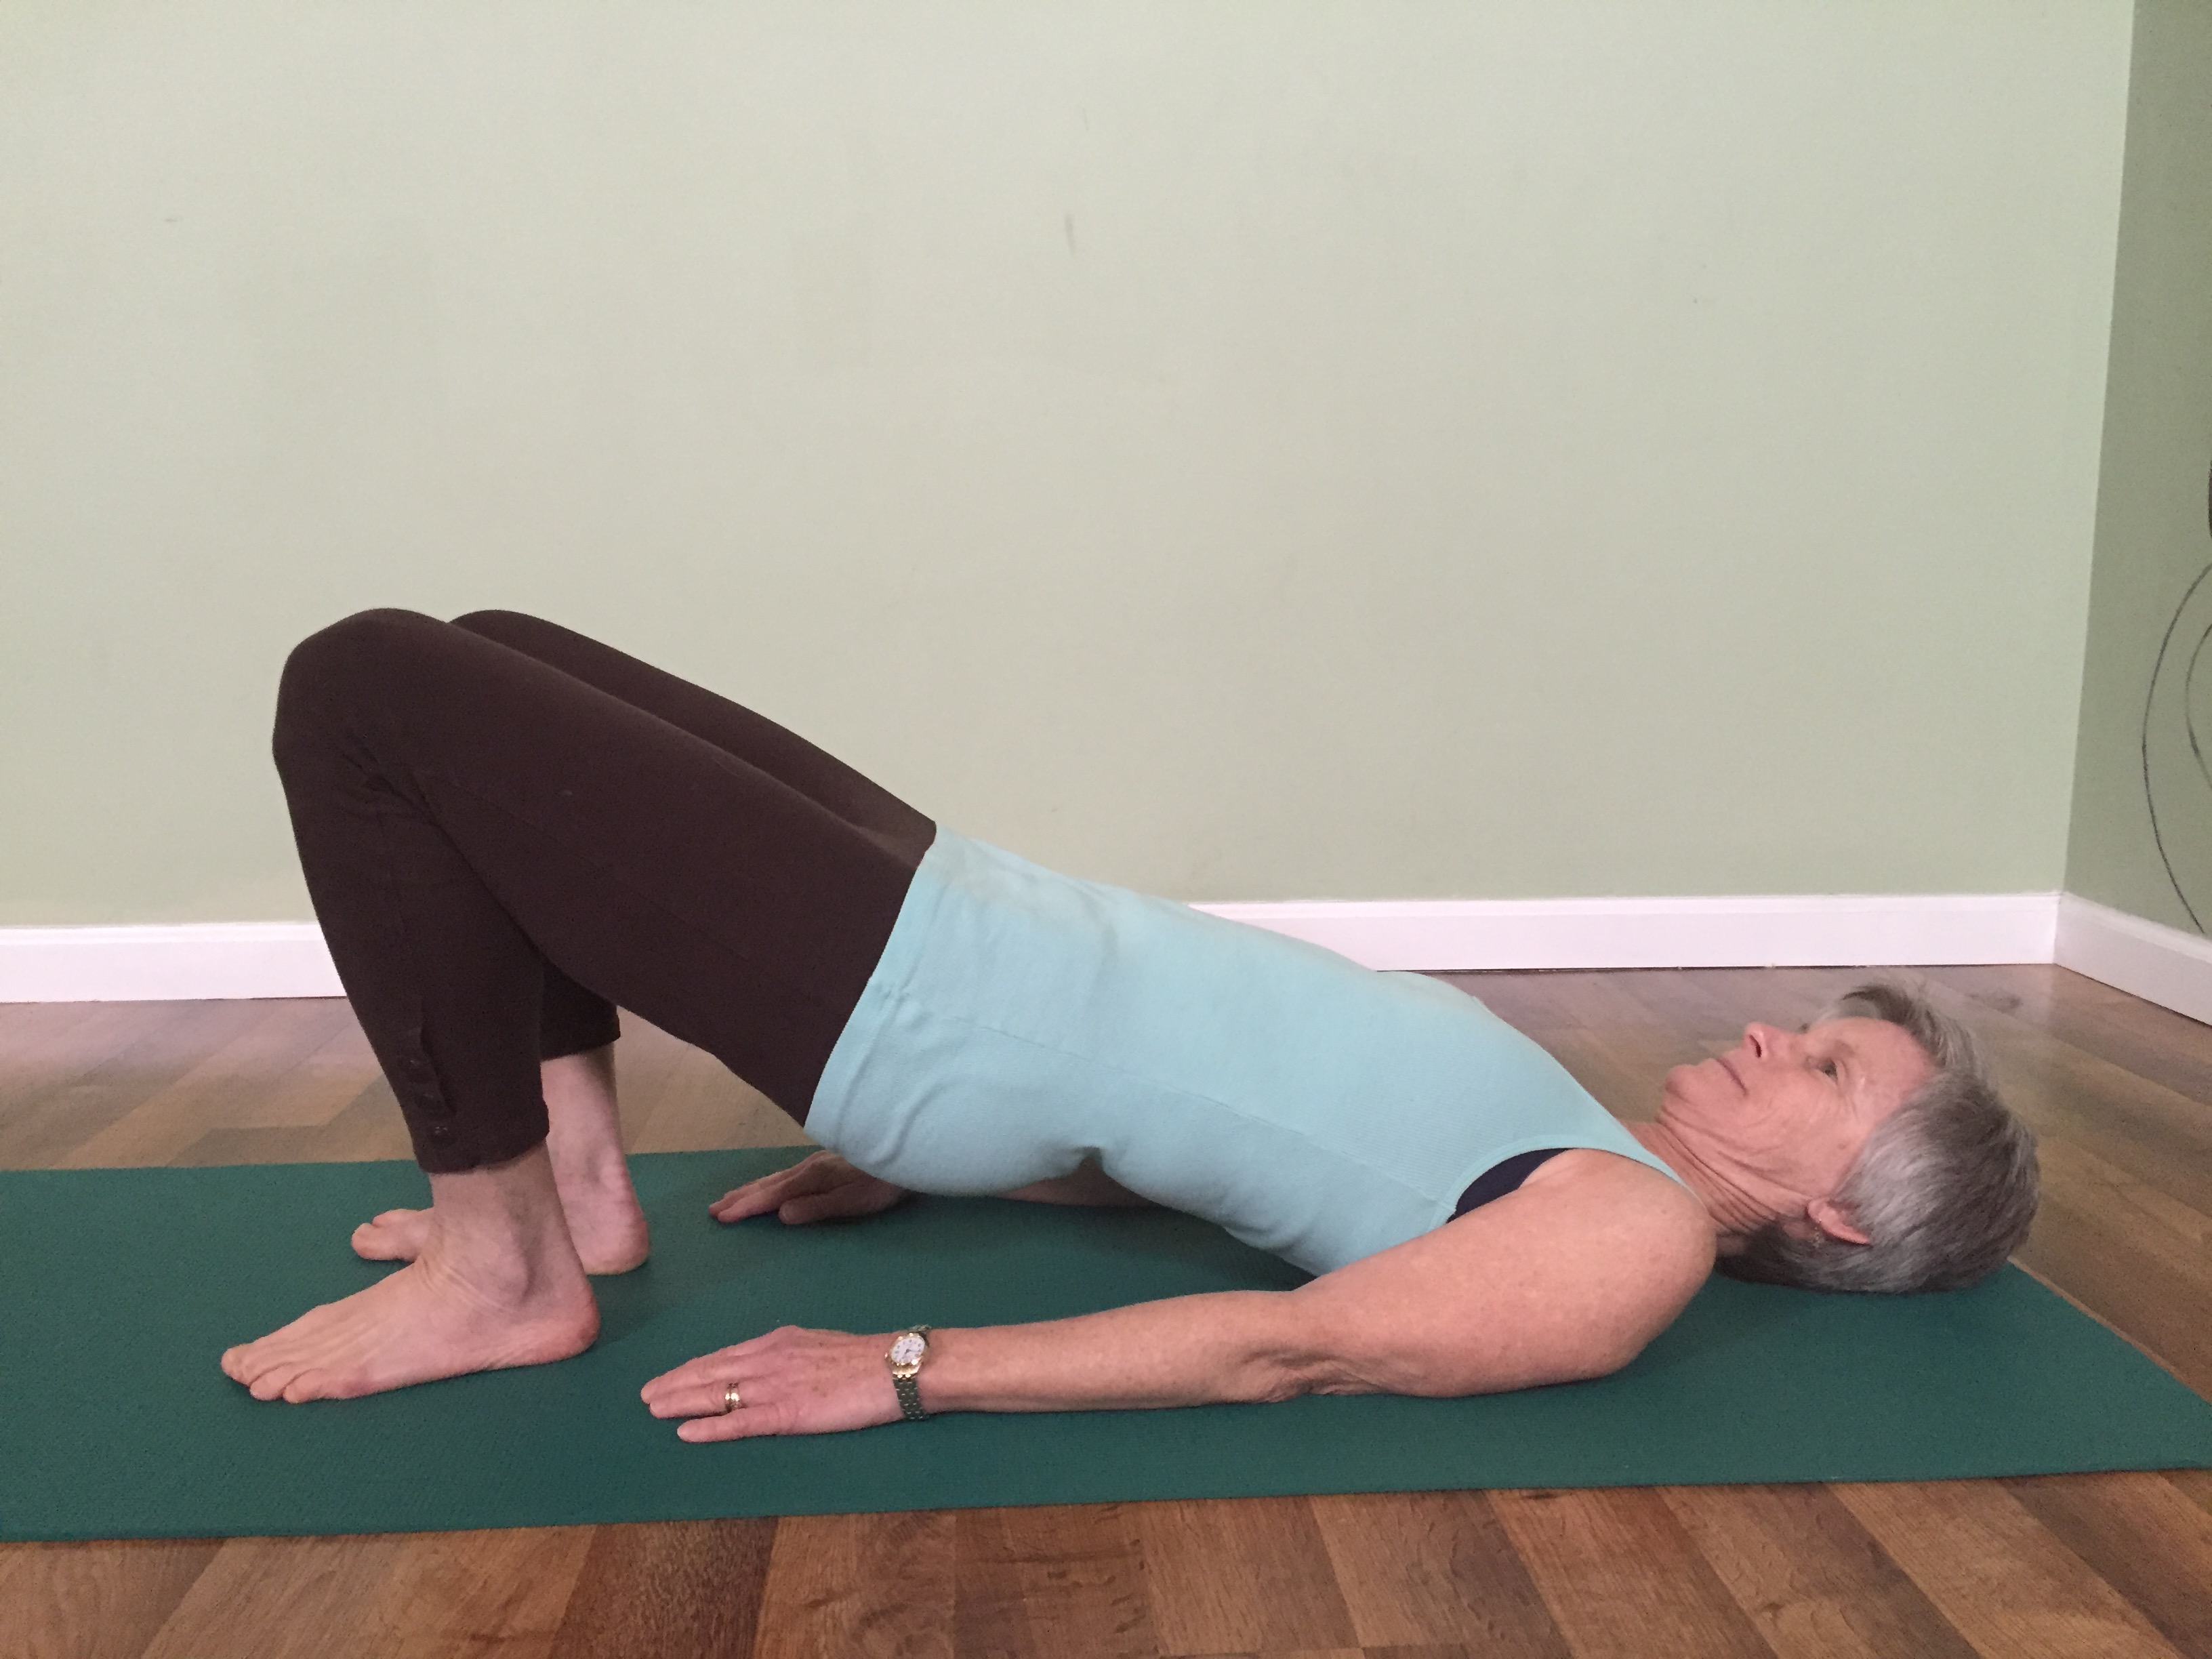
This backbend helps you to “fire up” the supporting muscles of your back and legs, while offering a less intense curvature of the spine than other backbends. Doing this pose first enables a warming of the back muscles, which prepares them for a safer stretch later.
1) Come to a position lying on your back, with your feet on the floor close to your buttocks, your thighs parallel to each other, and your knees pointing straight up to the ceiling.
2) Place your arms down at your sides.
3) Allow your shoulders to slide down and away from your ears while you elongate your neck, but keep your neck in its natural curve so that it does not touch the floor. (It arches slightly away from the floor.)
4) Stand into your feet as you lift your pelvis straight up toward the sky, pausing before you reach your maximum height.
5) As you pause, engage the muscles in the backs of your thighs as well as your buttocks muscles, to provide strength along with the stretch. Also, think of reaching the base of your spine away from the upper back so that you elongate or “traction” the spine a little more fully.
6) With the muscle engagement and tractioning in step five happening, now lift your pelvis up to a higher point where you can hold and take three full breaths.
7) Release back down to the floor on an exhalation.
 Cobra pose
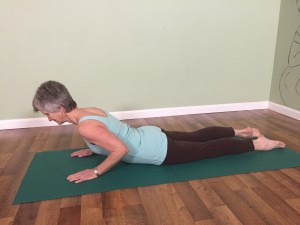
One of the most therapeutic yoga poses I regularly turn to, the cobra pose can help to strengthen the posterior support muscles, include those alongside the spine. Cobra also can help to better align the bones of the spine and pelvis.
1) Come to a position lying on your belly, with your face downward toward the floor and the tops of your feet on the floor.
2) “Reach” the top of your skull away from the toes, and the toes away from the skull. In effect, lengthening your entire body to prepare for the backbend.
3) Place your hands beneath your shoulders, with your elbows pointing upwards.
4) Start to lift your chest off the floor while keeping your feet down.
5) Engage the muscles of the buttocks and lower back to help you lift as much as you can without strain, and without recruiting much support from your hands/arms.
6) Hold the position for two or three breaths, and then release slowly back down as you exhale your breath out. Repeat the pose one or two more times.
 Child’s pose
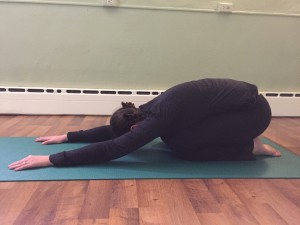
Transition very slowly from cobra pose to child’s pose, a forward bend with a healthy dose of calming energy for both the body and mind.
1) From a hands and knees position on the floor, begin to drop your hips and buttocks back to your heels.
2) Rest your hips down as comfortably into the egg-shaped position as possible.
3) If you have too much compression in the ankles, roll up a towel and place it on the floor directly underneath your ankles so that your heels remain more lifted.
4) If you experience too much compression in the knees, take a blanket and lay it across the calves (backs of your legs), so that it provides a cushion to “sit” back upon.
5) Your arms can fold up and stack on top of each other to create a shelf for your head to rest on; or, you can keep your arms either outstretched on the floor or wrapped around your sides.
6) Breathe deeply so that you can feel your back softly expand and contract with each breath in and out. Comfort is paramount in this position in order to reap the relaxation benefits. Hold the position for at least four deep breaths. Stay longer, up to two minutes, if it feels right for you.
Restrictive Diet
Those who experience muscular pain, joint pain, and other aches might find some relief by eliminating foods that are known to cause inflammation. If total elimination looms too large to tackle, think of a gradual approach by choosing a food, or food category, from the list below to eliminate for just one week. See how you feel; then try cutting out another one the following week.
Common inflammatory foods
Highly processed foods: “junk food,” packaged snacks, canned and/or prepared foods like soups, frozen meals
Lunch Meats: high in preservatives like nitrites and nitrates
Sugar: one of the most prevalent inflammatory ingredients of all, which is found in abundance in processed foods like yogurt, sports drinks, sodas, canned soups and sauces, and on and on
Sodium: another common additive found in overabundance in nearly all prepared foods
Wheat and refined grains: breads, pastas, boxed cereals, and nearly any grain that’s not in its whole state can produce an inflammatory effect within the body. Old-fashioned rolled oats are a “whole grain;” Cheerios are not. Brown rice is a whole grain; white rice — stripped of the husk, bran, and germ — is not a whole grain.
Dairy products: Some people experience greater allergies, mucous buildup, and other autoimmune or inflammatory issues with the consumption of dairy products.
Poor-quality oils: the common “vegetable oils” used in virtually all fast-food items contain high polyunsaturated omega 6 fats, which most Americans consume in excess. Corn oil, soybean oil, safflower, and sunflower oil are among the ones to reduce or eliminate. Good oils include olive oil, avocado, sesame, grape seed, and coconut oils — the latter for high heat.
Of course each person, based on his or her physical constitution and health status, has a unique response to any given food or food group. However, it’s my best practice to start with the low-tech, natural approach to health and wellness first and see if any positive results yield.
Food choice is about as low-tech and down to basics as you can get. If you create a diet that centers around real, fresh produce; beans and legumes; quality meats in moderation; and whole grains, you probably will feel better sooner.
Proportion recommendations of each of the above vary, but so far I’ve not heard of anyone dying or becoming ill from eating too many fruits and vegetables. Let those items fill up most of your plate, with an emphasis on the veggies.




 Digital Overexposure and Cultivating Stability
 Pony Club teaches youth horsemanship, responsibility, teamwork
 Try Low-Tech to Move Through It
 Cobra pose
 Child’s pose